Midjourney Unveils New Image Editor: How It Works
While Midjourney has just presented version 6.1 of its model and is already planning the arrival of 6.2, the development teams are taking the opportunity to improve the user experience on the AI image generator’s website. Indeed, a new edit mode has been unveiled, making it easier to use several of the image editing tools. Find out how this redesigned editor works in this article.
How Midjourney’s new image editor works
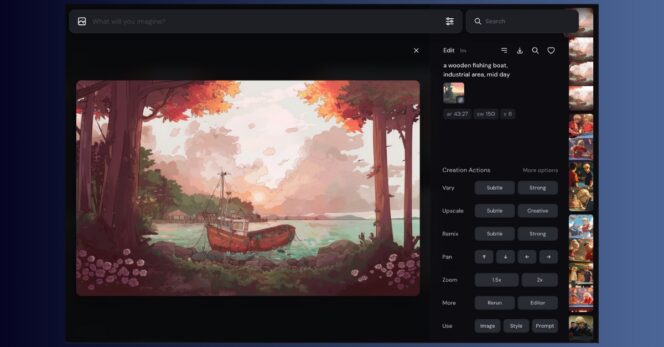
Midjourney continues to push its users towards its web platform, now accessible to all, with generative credits offered. It adopts the same tools as on Discord servers, but integrates them in a much more intuitive way for its members. The UX and UI of the image generator website allow more efficient uses of the visual generation and modification functions, as evidenced by the new editor integrated into the platform. To access it, you simply need to first click on one of your generated images. On the right, where the creative options appear, named Creative Actionsa button Editor appeared at the bottom of the list.
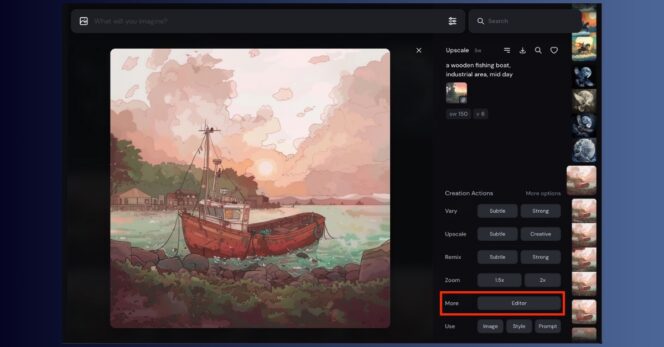
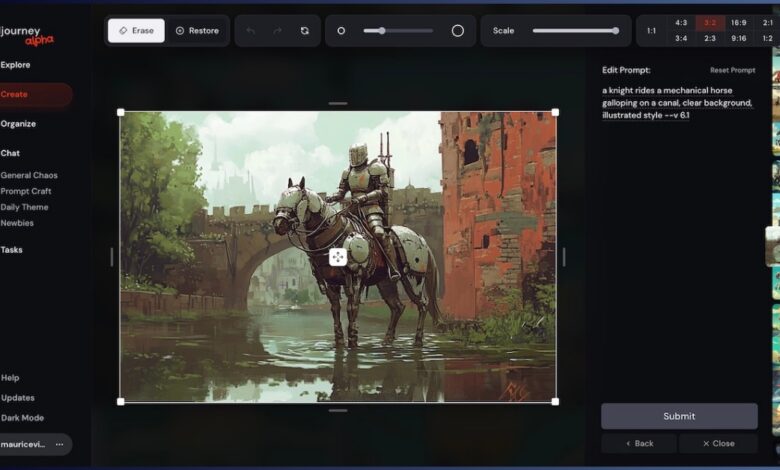
By clicking on it, the editor will open for the selected image. This offers several possibilities (see image of one):
- Editing the prompt: The text query used to generate the original image appears, allowing you to make changes to it.
- Format Editor: you can change the original image format by clicking on the dedicated buttons at the top right.
- Scale Editor: a named gauge Scale allows you to change the scale of the image. This option is similar to “zoom out” giving the possibility to extend the image frame.
- A selection brush: It allows you to select elements of the image, to add or remove details by associating it with the prompt modification and the buttons Erase (Delete) and Restore (Restore).
- Side and vertical handles: They offer the ability to extend your image up, down, right and/or left.
How to use Midjourney’s image editor
With this new editor that integrates already existing options, it is possible to very quickly make changes to your generated images and this, in a more precise way than via Discord servers. For example, you can easily extend the frame of your image upwards, to make room for the addition of an element. To do this, as shown in the video below, you just have to grab a vertical handle to “make room” for your addition, then select the area where the additional element will appear and specify it in your prompt. Thus, you can add a hat to the bird created in the video.
This is of course not the only possibility offered by the image editor on the Midjourney website. Indeed, some features are more precise, such as the zoom out. While it was necessary to set the retraction manually on Discord, leaving room for empirical learning, the gauge offered on the web platform gives you more freedom. Thus, it is much easier to obtain the desired result the first time, but also to perform two tasks at once. For example, if we want to change the format and retract the shooting of a given image, we just have to play with the buttons and the gauge, to ultimately create our own custom format.
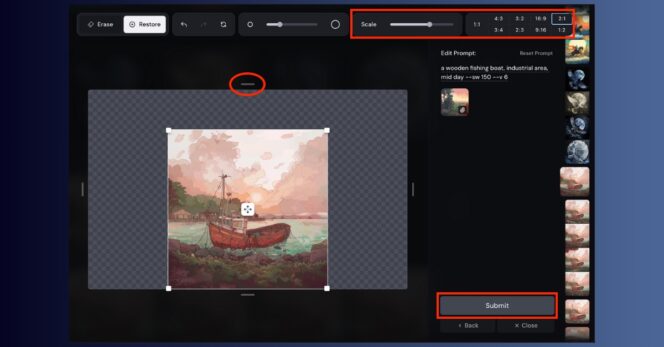
Once you have made your changes, remember to click the button Submit to generate your new images. Four visuals will be waiting for you in the tab Create. You can modify the one you have chosen at will by returning to the editor, or test other formulas!
